


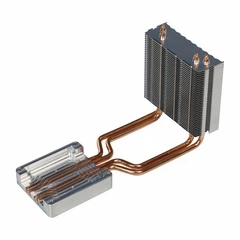
Hey there! As a supplier of water - cooled plate assemblies, I'm super stoked to walk you through the process of installing a water - cooled plate assembly. Whether you're a DIY enthusiast or a professional in the field, this guide will give you all the deets you need to get the job done right.
What's a Water - Cooled Plate Assembly?
Before we jump into the installation process, let's quickly chat about what a water - cooled plate assembly is. It's a crucial component in many systems, especially in high - performance electronics and automotive applications. The main job of a water - cooled plate assembly is to transfer heat away from a heat source, like a CPU or a power electronics module, using water as a coolant. This helps to keep the temperature of the device in check, which in turn improves its performance and lifespan.
Tools You'll Need
First things first, you gotta gather the right tools. Here's a list of what you'll typically need:
- Screwdriver set: You'll need different sizes to remove and install screws.
- Wrenches: For tightening fittings and connections.
- Thermal paste: This helps to improve heat transfer between the heat source and the water - cooled plate.
- Leak detection fluid: To check for any leaks after installation.
- Cleaning materials: Like isopropyl alcohol and lint - free cloths to clean the surfaces before installation.
Step 1: Preparation
The first step is all about getting everything ready. Start by turning off and unplugging the device that you'll be installing the water - cooled plate assembly on. This is super important for your safety. Next, clean the surface where the water - cooled plate will be mounted. Use isopropyl alcohol and a lint - free cloth to remove any dust, dirt, or grease. A clean surface ensures good contact and efficient heat transfer.
Now, take a look at the water - cooled plate assembly itself. Check for any damage during shipping. Make sure all the fittings are tight and there are no visible cracks or leaks. If you find any issues, contact us right away. We're here to make sure you get a high - quality product.
Step 2: Applying Thermal Paste
Thermal paste is like the secret sauce for good heat transfer. Apply a small amount of thermal paste to the center of the heat source. You don't need a ton; just a pea - sized drop is usually enough. Then, use a plastic card or a spreader to evenly spread the paste over the surface. The goal is to get a thin, uniform layer. This helps to fill in any microscopic gaps between the heat source and the water - cooled plate, allowing heat to transfer more easily.
Step 3: Mounting the Water - Cooled Plate
Carefully place the water - cooled plate on top of the heat source. Make sure it's aligned properly. Most water - cooled plates come with mounting holes that match the holes on the device. Use the appropriate screws and a screwdriver to secure the plate in place. Don't over - tighten the screws; just make them snug. Over - tightening can damage the plate or the device.
Step 4: Connecting the Water Lines
Now it's time to connect the water lines. You'll usually have an inlet and an outlet on the water - cooled plate. Attach the water hoses to these fittings using the appropriate wrenches. Make sure the connections are tight to prevent leaks. Some water - cooled plate assemblies come with quick - connect fittings, which make this step a breeze.
If you're using a pump to circulate the water, connect it to the water lines as well. Follow the manufacturer's instructions for the pump installation. Make sure the pump is properly grounded and wired if it's an electric pump.


Step 5: Filling the Cooling System
Once the water lines are connected, it's time to fill the cooling system with coolant. You can use a mixture of water and antifreeze, depending on your application. Slowly pour the coolant into the reservoir or the fill port. Keep an eye on the level and stop when it reaches the recommended level.
Step 6: Checking for Leaks
After filling the system, it's crucial to check for leaks. You can use leak detection fluid for this. Apply the fluid to all the connections and fittings. If there are any leaks, you'll see bubbles forming. If you find a leak, tighten the connection or replace the fitting if necessary.
Step 7: Testing the System
Once you're sure there are no leaks, it's time to test the system. Turn on the device and the pump. Monitor the temperature of the heat source using a temperature sensor. You should see a significant drop in temperature compared to before the installation. If the temperature doesn't drop or if it starts to rise abnormally, there might be an issue with the installation. Double - check all the connections and the alignment of the water - cooled plate.
Different Applications of Water - Cooled Plate Assemblies
Water - cooled plate assemblies are used in a wide range of applications. For example, in the automotive industry, they're used in Automotive Controller Water Cooling Plate to keep the electronic controllers cool. These controllers manage various functions in the car, and overheating can lead to malfunctions.
Another automotive application is the Automobile Car Drainage Raditor. Water - cooled plates help to dissipate the heat generated by the engine and other components, ensuring the car runs smoothly.
In the communication industry, Aluminum Heat Pipe Communication Module Heatsink use water - cooled plate assemblies to cool down the high - power communication modules. This helps to maintain the performance and reliability of the communication systems.
Contact Us for Your Water - Cooled Plate Assembly Needs
If you're in the market for high - quality water - cooled plate assemblies, look no further. We're a leading supplier with years of experience in the industry. Our products are designed to meet the highest standards of quality and performance. Whether you need a custom - designed water - cooled plate assembly or a standard one, we've got you covered.
Don't hesitate to reach out to us for more information or to discuss your specific requirements. We're here to help you find the perfect solution for your cooling needs. Let's work together to keep your devices running cool and efficient!
References
- Cooling Technology Handbook
- Automotive Electronics Cooling Guidelines
- Communication Module Thermal Management Best Practices