


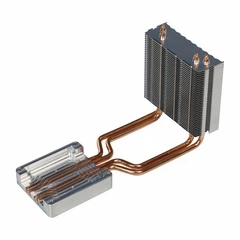
Hey there! As a supplier of aluminum automotive radiators, I've seen firsthand how crucial it is to ensure proper alignment during installation. A misaligned radiator can lead to a whole host of problems, from reduced cooling efficiency to leaks and even engine damage. So, in this blog post, I'm gonna share some tips and tricks on how to make sure your aluminum automotive radiator goes in just right.
Pre-Installation Checks
Before you even start the installation process, it's important to do a few pre-installation checks. First off, take a good look at the radiator itself. Make sure there are no visible signs of damage, like dents, cracks, or bent fins. If you spot any issues, it's best to replace the radiator before proceeding.
Next, check the mounting points on your vehicle. These are the spots where the radiator will be attached. Make sure they're clean and free of any debris or rust. If there's any rust, you can use a wire brush to clean it off. Also, check that the mounting holes are the right size and shape for the radiator.
You'll also want to gather all the necessary tools for the installation. This typically includes a socket set, wrenches, and a torque wrench. Having the right tools on hand will make the installation process go a lot smoother.
Understanding the Alignment Process
Proper alignment starts with understanding how the radiator fits into your vehicle. Most aluminum automotive radiators are designed to fit into a specific space in the engine compartment. You need to make sure the radiator is oriented correctly. This means that the inlet and outlet ports are in the right position to connect to the engine's cooling system.
The radiator should also sit flat and level in its mounting location. Any tilt or unevenness can cause problems with the flow of coolant and lead to poor cooling performance. To check for levelness, you can use a small level tool. Place it on top of the radiator and make sure it reads level in both directions.
Step-by-Step Installation for Alignment
Let's get into the step-by-step process of installing the radiator for proper alignment.
- Position the Radiator: Carefully lift the radiator and place it into the mounting area. Be gentle to avoid any damage to the radiator or the surrounding components. Make sure the radiator is lined up with the mounting holes on the vehicle.
- Insert the Mounting Bolts: Once the radiator is in position, insert the mounting bolts through the holes in the radiator and into the mounting points on the vehicle. Don't fully tighten the bolts yet. Just hand-tighten them enough to hold the radiator in place.
- Check the Alignment Again: After inserting the bolts, double-check the alignment. Make sure the radiator is still level and that the inlet and outlet ports are lined up with the hoses. You can use a straightedge to check if the radiator is sitting straight.
- Tighten the Mounting Bolts: Once you're satisfied with the alignment, use a torque wrench to tighten the mounting bolts to the manufacturer's specifications. Over-tightening the bolts can damage the radiator or the mounting points, so it's important to use the correct torque.
Connecting the Hoses
Connecting the hoses is another important part of the alignment process. The hoses need to be properly attached to the inlet and outlet ports of the radiator.
- Prepare the Hoses: Before attaching the hoses, make sure they're clean and free of any debris. You can use a hose clamp pliers to loosen the hose clamps if they're already on the hoses.
- Attach the Hoses: Slide the hoses onto the inlet and outlet ports of the radiator. Make sure they're pushed on all the way. Then, use the hose clamp pliers to tighten the hose clamps. Make sure the clamps are tight enough to prevent any leaks, but not so tight that they damage the hoses.
- Check for Leaks: Once the hoses are attached, turn on the engine and let it run for a few minutes. Check for any signs of coolant leaks around the hoses and the radiator. If you see any leaks, tighten the hose clamps or replace the hoses if necessary.
Using Alignment Aids
Sometimes, it can be helpful to use alignment aids to ensure proper alignment. For example, some radiators come with alignment pins or guides that help you position the radiator correctly. If your radiator has these features, make sure to use them.
You can also use a piece of cardboard or a template to mark the position of the radiator on the vehicle before installation. This can give you a visual reference and make it easier to align the radiator.
Common Alignment Issues and How to Fix Them
Even with careful installation, you might run into some alignment issues. Here are some common problems and how to fix them.
- Misaligned Ports: If the inlet or outlet ports of the radiator are not lined up with the hoses, you may need to adjust the position of the radiator. Loosen the mounting bolts slightly and gently move the radiator until the ports are in the right position. Then, tighten the bolts again.
- Uneven Mounting: If the radiator is not sitting flat or level, you can try adding shims under the mounting points to level it out. Shims are thin pieces of metal or plastic that can be used to adjust the height.
- Interference with Other Components: Sometimes, the radiator may interfere with other components in the engine compartment. If this happens, you may need to make some modifications to the surrounding components or the radiator itself. However, this should be done carefully to avoid any damage.
Importance of Proper Alignment
Proper alignment of the aluminum automotive radiator is crucial for several reasons. First of all, it ensures efficient cooling of the engine. When the radiator is aligned correctly, coolant can flow freely through the system, removing heat from the engine effectively.
Secondly, proper alignment helps prevent leaks. If the radiator is misaligned, the hoses may not be properly attached, which can lead to coolant leaks. Coolant leaks can not only cause the engine to overheat but also damage other components in the engine compartment.


Finally, proper alignment extends the lifespan of the radiator. A misaligned radiator can put extra stress on the mounting points and the hoses, which can lead to premature wear and tear. By ensuring proper alignment, you can make sure your radiator lasts as long as possible.
Related Products
If you're interested in other related products, we also offer Aluminum Heat Pipe Communication Module Heatsink, Cavity-type Energy Storage Battery Water Cooling Plate, and Automobile Car Drainage Raditor. These products are designed to work together to provide optimal cooling solutions for your automotive needs.
Contact for Purchase
If you're looking to purchase an aluminum automotive radiator or any of our other products, we'd love to hear from you. We offer high-quality products at competitive prices and excellent customer service. Contact us to start a procurement negotiation and find the best solution for your cooling needs.
References
- "Automotive Cooling System Handbook"
- Various automotive repair manuals and online resources
So, there you have it! By following these tips and tricks, you can ensure proper alignment of your aluminum automotive radiator during installation. Remember, a little extra care during installation can go a long way in keeping your engine cool and running smoothly.