


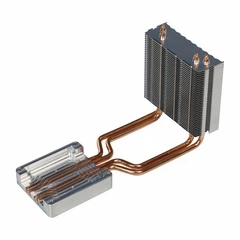
As a supplier of Cooling System Components, I've witnessed firsthand the critical role a radiator core plays in the efficient operation of a cooling system. Over time, radiator cores can accumulate dirt, debris, and scale, which can impede their performance and lead to overheating issues. In this blog post, I'll share a step-by-step guide on how to clean a radiator core in a cooling system, drawing on my industry experience and knowledge.
Why Clean the Radiator Core?
Before delving into the cleaning process, it's essential to understand why cleaning the radiator core is so important. The radiator core is responsible for dissipating heat from the engine coolant, allowing the engine to operate at an optimal temperature. When the core becomes clogged with dirt, rust, or other contaminants, its ability to transfer heat is significantly reduced. This can lead to increased engine temperatures, decreased fuel efficiency, and potentially serious engine damage. Regularly cleaning the radiator core helps maintain its efficiency, extends the life of the cooling system, and ensures the reliable operation of the vehicle or equipment.
Tools and Materials Needed
To clean a radiator core effectively, you'll need the following tools and materials:


- Radiator flush kit: This typically includes a cleaning solution and a hose adapter for connecting to the radiator.
- Garden hose: For rinsing the radiator core.
- Soft-bristled brush: To gently scrub the radiator fins.
- Safety goggles and gloves: To protect your eyes and hands from the cleaning solution and debris.
- Bucket: To collect the drained coolant and cleaning solution.
- Rags or towels: For wiping up spills and drying the radiator.
Step-by-Step Cleaning Process
Step 1: Prepare the Vehicle
- Park the vehicle on a level surface and let the engine cool down completely. Working on a hot engine can be dangerous and may cause burns.
- Locate the radiator drain plug or petcock. This is usually located at the bottom of the radiator. Place a bucket beneath the drain plug to collect the coolant.
- Open the drain plug and allow the coolant to drain completely. Be sure to dispose of the coolant properly, as it is toxic and can harm the environment.
Step 2: Remove the Radiator Cap
- Once the coolant has drained, remove the radiator cap. This will allow air to enter the radiator and prevent a vacuum from forming during the cleaning process.
Step 3: Connect the Radiator Flush Kit
- Follow the instructions provided with the radiator flush kit to connect it to the radiator. This typically involves attaching a hose adapter to the radiator inlet or outlet and connecting the flush kit to the adapter.
- Fill the radiator with water and the recommended amount of cleaning solution. The cleaning solution helps to break down and dissolve the dirt, rust, and scale inside the radiator core.
Step 4: Run the Engine
- Start the engine and let it run for the specified time recommended by the flush kit manufacturer. This allows the cleaning solution to circulate through the radiator core and loosen the contaminants.
- Monitor the engine temperature gauge to ensure that the engine does not overheat during the cleaning process. If the temperature begins to rise, turn off the engine immediately and let it cool down before continuing.
Step 5: Rinse the Radiator Core
- After the specified time has elapsed, turn off the engine and disconnect the flush kit.
- Use a garden hose to rinse the radiator core thoroughly. Start by rinsing the top of the radiator and work your way down, ensuring that all the cleaning solution and debris are removed.
- Use a soft-bristled brush to gently scrub the radiator fins to remove any stubborn dirt or debris. Be careful not to damage the fins, as this can affect the radiator's performance.
Step 6: Check for Blockages
- Inspect the radiator core for any signs of blockages or damage. Look for bent or collapsed fins, clogged tubes, or other obstructions that may prevent the proper flow of coolant.
- If you find any blockages, use a wire or a small pick to carefully remove them. Be gentle to avoid damaging the radiator core.
Step 7: Refill the Radiator
- Once the radiator core is clean and free of blockages, refill the radiator with fresh coolant. Use the recommended coolant type and mixture for your vehicle or equipment.
- Replace the radiator cap and check for any leaks. Start the engine and let it run for a few minutes to allow the coolant to circulate through the system.
Additional Tips and Considerations
- Regular maintenance: In addition to periodic cleaning, it's important to perform regular maintenance on your cooling system, such as checking the coolant level, inspecting the hoses and belts for wear, and replacing the coolant at the recommended intervals.
- Use the right cleaning solution: Make sure to use a radiator flush kit that is specifically designed for your vehicle or equipment. Using the wrong cleaning solution can damage the radiator core and other components of the cooling system.
- Be gentle with the radiator fins: The radiator fins are delicate and can be easily damaged. When scrubbing the fins, use a soft-bristled brush and apply gentle pressure to avoid bending or breaking them.
- Dispose of the coolant properly: Coolant is toxic and can harm the environment if not disposed of properly. Be sure to follow the local regulations for disposing of used coolant.
Conclusion
Cleaning a radiator core is an important part of maintaining the health and performance of a cooling system. By following the steps outlined in this blog post and using the right tools and materials, you can effectively clean the radiator core and ensure the reliable operation of your vehicle or equipment. If you have any questions or need further assistance, please don't hesitate to contact us. We're a leading supplier of Cooling System Components, offering a wide range of products such as Automobile Car Drainage Raditor, Automotive Controller Water Cooling Plate, and Aluminum Heat Pipe Communication Module Heatsink. Whether you're looking to upgrade your existing cooling system or need replacement parts, we have the expertise and products to meet your needs. Contact us today to discuss your requirements and explore how we can help you optimize the performance of your cooling system.
References
- "Automotive Cooling System Basics," Motor Age Magazine
- "Radiator Maintenance and Repair Guide," Chilton's Automotive Repair Manual