


Hey there! As a supplier in the automotive cooling system industry, I often get asked about testing thermostats in automotive cooling systems. It's a crucial component that ensures your engine runs at the right temperature, so getting it tested properly is super important. In this blog, I'll walk you through how you can test a thermostat in an automotive cooling system.
Why Testing the Thermostat is Important
Before we dive into the testing process, let's quickly talk about why it's so important to test your thermostat. The thermostat in your car's cooling system regulates the engine's temperature. If it fails, the engine can overheat or run too cold. An overheating engine can cause serious damage, like warping the cylinder head or even seizing the engine. On the other hand, an engine running too cold can lead to poor fuel efficiency and increased emissions. So, regular testing of the thermostat can save you from costly repairs and keep your car running smoothly.
Tools You'll Need
To test a thermostat, you'll need a few basic tools. Here's what you'll need:


- A large metal container or a pot
- A thermometer (preferably a digital one for accuracy)
- A heat source (like a stove)
- A pair of pliers
- Safety gloves and goggles
Step-by-Step Testing Process
Step 1: Remove the Thermostat
First things first, you need to remove the thermostat from your car's cooling system. Make sure the engine is completely cool before you start. Locate the thermostat housing, which is usually connected to the engine by a large hose. Use a wrench to loosen the bolts or clips holding the housing in place. Carefully remove the housing and take out the thermostat. Be careful not to damage the gasket or any other parts while doing this.
Step 2: Visual Inspection
Once you've removed the thermostat, give it a good visual inspection. Look for any signs of damage, like cracks, corrosion, or stuck parts. If you notice any visible damage, it's likely that the thermostat needs to be replaced. However, even if it looks okay on the outside, it still needs to be tested further.
Step 3: Prepare the Testing Setup
Fill the large metal container or pot with water. Place it on the heat source and insert the thermometer into the water. Make sure the thermometer is fully submerged but not touching the bottom of the container.
Step 4: Heat the Water
Turn on the heat source and start heating the water. As the water heats up, keep an eye on the thermometer. You're going to be monitoring the temperature closely to see how the thermostat reacts.
Step 5: Place the Thermostat in the Water
Once the water reaches around 180°F (82°C), use the pliers to carefully place the thermostat into the water. Make sure it's fully submerged. If the thermostat is working properly, you should start to see it open as the water temperature rises.
Step 6: Observe the Thermostat
As the water continues to heat up, watch the thermostat closely. A normal thermostat should start to open at around 180 - 195°F (82 - 91°C). If it doesn't open at all or opens at a significantly different temperature, it's a sign that the thermostat is faulty and needs to be replaced.
Step 7: Check the Full Opening Temperature
Keep heating the water until it reaches around 200 - 210°F (93 - 99°C). At this point, the thermostat should be fully open. Measure the amount by which it has opened. If it doesn't open fully or is still partially closed, it's not working correctly.
Step 8: Cool the Water and Check Closing
After you've checked the opening, turn off the heat source and let the water cool down. As the water cools, the thermostat should start to close. Observe it closely to make sure it closes properly. If it doesn't close completely or gets stuck while closing, it's another indication of a faulty thermostat.
Other Testing Methods
Apart from the water bath method, there are a couple of other ways to test a thermostat.
Using a Scan Tool
If you have access to a scan tool, you can use it to read the engine's temperature sensor data. This will give you an idea of whether the thermostat is regulating the temperature correctly. However, this method requires some technical knowledge and the right equipment.
Pressure Testing
Some automotive shops use pressure testing to check the thermostat. This involves applying pressure to the cooling system and monitoring how the thermostat responds. It's a more advanced method and is usually done by professionals.
Our Products for Automotive Cooling Systems
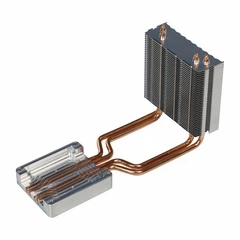
At our company, we offer a wide range of products for automotive cooling systems. We have some really great options that can enhance the performance of your cooling system. For example, our Lightweight Automotive Controller Water Cooling Plate is designed to be lightweight and efficient, helping to keep your engine cool. Our Aluminum Heat Pipe Communication Module Heatsink is another great product that uses advanced heat pipe technology to dissipate heat effectively. And if you're looking for a reliable Automotive Controller Water Cooling Plate, we've got you covered.
Conclusion
Testing a thermostat in an automotive cooling system is not that difficult if you follow the right steps. By regularly testing your thermostat, you can prevent engine problems and ensure your car runs at its best. If you find that your thermostat is faulty, don't hesitate to replace it. And if you're in the market for high - quality automotive cooling system products, we're here to help. Whether you're a car enthusiast or a professional mechanic, our products are designed to meet your needs.
If you're interested in our products or have any questions about automotive cooling systems, feel free to reach out to us for a procurement discussion. We're always happy to help you find the right solutions for your automotive cooling needs.
References
- Haynes Automotive Repair Manuals
- Chilton's Auto Repair Manuals
- Online automotive forums and communities